
Bathroom Waterproofing Guide: Prevent Mold and Leaks in LA

Tile can look finished while water is already reaching the framing behind it. In a Los Angeles bathroom remodel, the protection beneath the tile matters as much as the visible surface, especially around the shower pan, corners, plumbing penetrations, and wall transitions.
A reliable bathroom waterproofing guide starts with a complete moisture-control system, not one product. The shower pan must drain correctly, the membrane must form a watertight barrier, and the selected backer and vapor-control layers must suit the wall assembly. Cement board alone is a tile substrate, not waterproofing.
These details help limit mold growth and structural damage before a concealed leak becomes a major repair. The right approach also depends on how the shower floor, walls, ventilation, and finish materials work together. First, it is worth understanding why waterproofing deserves attention before comparing membranes, hot mopping, and backer boards.
Why Is Bathroom Waterproofing So Important?
Bathroom waterproofing is important because it controls moisture before water can reach hidden building materials. In Los Angeles, that protection helps reduce the risk of mold, structural damage, and disruptive repairs while preserving the quality of the renovation.
Request Your Estimate or call (310) 382-1001 to discuss your bathroom project with LevelWorks.
Bathrooms are exposed to repeated moisture from showers, baths, sinks, and condensation. Tile and grout create a finished surface, but they are not the complete waterproofing strategy. Water can move through joints, corners, penetrations, and small installation gaps if the layers behind the finish are not designed to manage it.
That matters in Los Angeles because local homes experience varied soil and climate conditions. A bathroom that appears dry at the surface can still allow moisture into walls, floors, or framing. Once moisture remains trapped, the consequences may include:
Mold growth in concealed or poorly ventilated areas.
Damage to framing, subflooring, and other structural materials.
Peeling finishes, swollen materials, or recurring stains.
Removal and reconstruction that could have been avoided with proper installation.
Waterproofing is a complete system
Effective waterproofing is not a single coating or product. It is a coordinated system that may include the shower pan, wall barrier, seams, corners, penetrations, substrate, drainage, and finish installation. Each component must work with the next so water is directed toward the drain instead of into the assembly.
Professional expertise is especially valuable at transitions and details that are easy to overlook. A membrane may be excellent, for example, but an unsealed pipe penetration or poorly handled corner can still create a path for water. The same is true when a water-resistant backer material is treated as though it were the waterproof barrier itself.
Investing attention in these details supports long-term quality and helps protect the structure beneath a new bathroom. When waterproofing fails, repairs can extend beyond replacing tile. Hidden mold and damaged structural materials may require opening finished surfaces, correcting the source, and rebuilding affected areas. A properly planned system is therefore part of responsible bathroom remodeling, not an optional upgrade.
How Does a Shower Pan Membrane Keep Water Out?
Direct answer: A shower pan membrane creates the foundational watertight barrier beneath the shower floor and along the lower walls. When it is installed as one continuous system, water is contained, directed toward the drain, and kept away from framing and subfloor materials.
Tile and grout form the visible finish, but they are not the primary defense against water intrusion. The membrane sits behind or beneath those finish materials and handles the moisture that passes through joints, grout lines, and small surface imperfections. That distinction matters because a shower can look finished while water is already reaching the structure below.
What the membrane does
Forms a continuous barrier beneath the shower floor.
Extends up the walls so the pan and wall protection work together.
Contains moisture instead of allowing it to migrate into framing or the subfloor.
Works with the drain assembly to move water out of the shower.
For the barrier to perform properly, the membrane must extend up the walls and be detailed without gaps, punctures, or weak transitions. The corners, wall-to-floor connections, drain connection, and any penetrations require the same care as the main field of the pan. A break in one of these areas can undermine an otherwise well-installed system.
The shower floor also needs a consistent slope toward the drain. A minimum slope of about 1/4 inch per foot directs water to the drain rather than allowing it to sit in low areas. Standing water increases the opportunity for moisture to work through joints and makes the shower harder to keep dry.
That is why waterproofing should be treated as a coordinated system, not as a single product applied at the end. The membrane, slope, drain detail, wall transitions, and finish installation must work together. During a bathroom remodel, these concealed steps deserve careful planning and inspection before tile covers the assembly.
What Is Hot Mopping in a Bathroom Waterproofing Guide?
Hot mopping is a traditional shower waterproofing method that uses heated, rubberized asphalt to create a seamless barrier across the shower pan. Applied in layers over the prepared pan, the material bonds into a durable waterproof membrane that helps keep shower water from reaching the framing and subfloor.
Unlike a surface coating that may cover only one area, a properly installed hot-mopped pan is designed as a continuous barrier. The installer prepares the shower floor, addresses the drain connection, and applies hot rubberized asphalt in successive layers. Each layer builds the waterproofing system across the pan and up the surrounding walls where the design requires protection.
How does a hot-mopped shower pan work?
The asphalt is heated until it can be spread across the pan. The installer then builds the membrane through repeated applications, paying close attention to corners, transitions. The drain, and any locations where water could otherwise find a path into the assembly. Once the barrier is complete, the shower floor still needs the correct drainage design and a properly installed tile surface above it.
That sequence matters because tile and grout are finish materials, not a substitute for the waterproofing layer below them. The hot mop does the moisture-control work beneath the visible shower finish. Its seamless design can reduce the number of joints where water might pass through when the pan is prepared and installed correctly.
Why do contractors still choose hot mopping?
Hot mopping remains a practical choice when a project calls for a durable, traditional shower pan method and the contractor has the experience to install it properly. Contractors may consider it when:
The shower design is compatible with a built-up pan and hot-applied membrane.
The project benefits from a continuous barrier rather than multiple exposed seams.
The installer can coordinate the pan, drain, wall transitions, and tile preparation as one waterproofing system.
The homeowner prefers a proven traditional approach for the shower floor.
Hot mopping is not automatically the right solution for every bathroom. The assembly, materials, ventilation, drain, and wall waterproofing details must work together. A qualified remodeling contractor should evaluate those conditions before selecting the method, rather than treating the hot mop as an isolated product decision.
Cement Board vs. Waterproof Backer Board: What's the Difference?
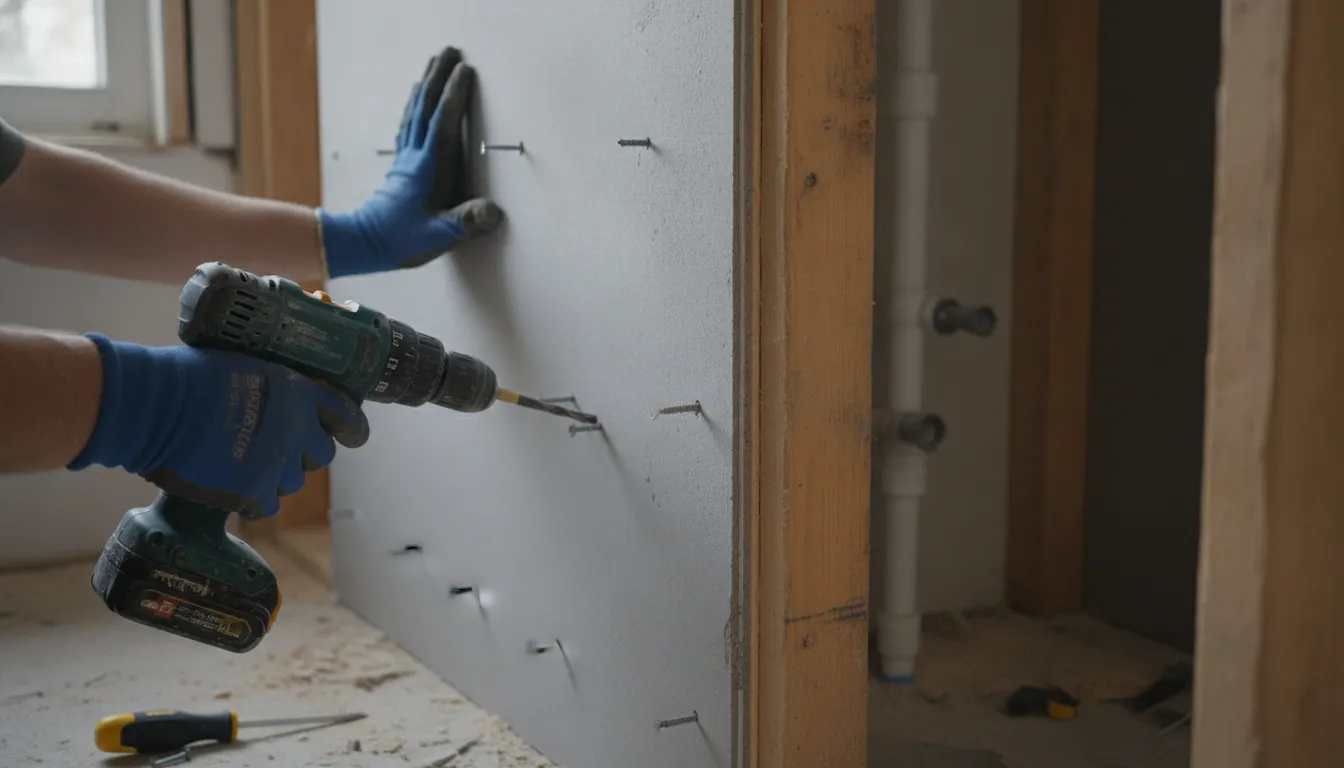
Direct answer: Cement board is a strong, stable substrate for tile, but it is not waterproof on its own. A water-resistant backer board also needs a separate waterproofing strategy. In a shower or another consistently wet area, a specialized waterproof backer board is designed to provide longer-term moisture resistance when the full system is installed correctly.
The distinction matters because tile and grout do not turn a wall assembly into a waterproof barrier. Water can move through joints, penetrations, and surrounding materials if the backer and membrane system are not selected and detailed for the location. Treat the board as one part of the assembly, not as the entire waterproofing plan.
What should you use in a shower?
For a shower, the priority is continuity. A specialized waterproof backer board can help protect the wet zone, but its joints, corners, fasteners, transitions, and penetrations still require compatible treatment. The shower pan and wall waterproofing must work together so water is directed toward the drain rather than into the framing.
Confirm whether the selected board is actually waterproof or merely water resistant.
Use the manufacturer-compatible treatment for seams, corners, and penetrations.
Coordinate the wall system with the shower pan membrane and finished tile.
Do not rely on the tile surface alone to stop moisture.
In a bathroom waterproofing guide, the practical takeaway is simple: choose materials based on the moisture exposure, then install them as one coordinated system. Cement board can perform well as a substrate, while waterproof backer board is the more direct choice for high-moisture zones when long-term protection is required.
Do You Need a Vapor Barrier in a Bathroom?
Usually, a bathroom wall assembly needs a carefully planned moisture-control strategy, but a vapor barrier is not a substitute for surface waterproofing. A vapor barrier is installed on the warm side of the wall assembly to control moisture transmission through the wall. It works within the structure, while the waterproofing layer protects exposed surfaces and wet-zone materials from liquid water.
What a vapor barrier does
Bathrooms produce repeated bursts of warm, humid air from showers, baths, and sink use. Without a way to manage that moisture, vapor can migrate into wall cavities and contribute to damp materials over time. The correct location of the barrier matters. Placing it on the warm side of the assembly helps limit moisture movement before it reaches vulnerable parts of the wall.
The right approach depends on the wall design, climate, materials, and existing construction. Adding layers without understanding how the assembly handles drying can create problems rather than solve them. This is one reason bathroom waterproofing should be treated as a coordinated system, not a single product selection.
Why ventilation still matters
A vapor barrier does not remove humidity from the room. Ventilation is critical because it removes or dilutes moisture and helps control indoor humidity. Use the bathroom exhaust fan as intended, provide adequate make-up air, and address lingering condensation rather than allowing the room to remain damp after bathing.
Run the exhaust fan during bathing and long enough afterward to clear humid air.
Watch for persistent condensation on mirrors, windows, ceilings, or wall surfaces.
Keep wet areas able to dry between uses instead of trapping moisture behind finishes.
Address mold or recurring dampness promptly, since mold thrives in damp, humid environments.
Vapor barrier vs. surface waterproofing
Surface waterproofing is the layer applied to shower walls, floors, and other wet-zone surfaces to stop liquid water from reaching the substrate. A shower membrane, waterproof backer system, or approved topical waterproofing assembly can perform that role. Cement board alone provides a solid tile substrate, but it is not inherently waterproof.
In practical terms, the vapor barrier manages moisture moving through the wall assembly, while surface waterproofing manages water contacting the finished wet area. Good bathroom construction coordinates both with drainage, tile installation, sealants, and ventilation. If the walls stay damp, the fan is weak, or the waterproofing layers do not connect continuously, one component cannot compensate for the gap.
Where Should You Spend on Bathroom Waterproofing?
Spend first on the complete waterproofing system, not on a single product. The shower pan and membrane, wet-zone wall assembly, moisture control, ventilation, and installation details must work together. The right scope depends on the bathroom's layout, existing conditions, construction method, and how much of the room is exposed to water.
A durable renovation protects the structure behind the tile. It also reduces the risk that a concealed leak will force repairs soon after the finished surfaces are installed. Waterproofing is therefore part of long-term quality, not an optional finish.
1. Prioritize the shower pan and membrane system
The shower floor is the first place to protect because it receives concentrated, repeated water exposure. The pan should direct water toward the drain, while the membrane should create a watertight barrier that continues up the walls. Seams, corners, penetrations, and the drain connection deserve the same attention as the broad field of the membrane.
Confirm that the shower pan is designed for reliable drainage.
Use a waterproofing method suited to the construction and shower design.
Detail transitions and penetrations carefully instead of treating them as minor finishing steps.
A seamless traditional hot-mopped pan or a compatible membrane system can be effective when properly selected and installed. The important decision is not choosing a product in isolation. It is creating a continuous system that keeps water from reaching the framing and subfloor.
2. Protect the wet-zone walls behind the tile
Tile and grout are visible finishes, but they are not the entire moisture-control strategy. In high-moisture areas, the backer and membrane details should be selected and coordinated as one assembly. Cement board can provide a strong substrate for tile, but it is not inherently waterproof. A water-resistant backer board is not automatically a waterproof barrier either.
Specify a suitable waterproof backer or membrane for the wet zone.
Seal joints, corners, fasteners, and plumbing penetrations according to the system requirements.
Coordinate the wall assembly with the shower pan so the barriers connect continuously.
3. Account for vapor control and ventilation
Moisture management does not stop at the shower enclosure. The wall assembly may need a vapor-control strategy appropriate to the building conditions, and the bathroom needs ventilation that helps control indoor humidity. These choices depend on the existing walls, location, mechanical system, and overall scope. Overlooking them can leave moisture trapped or allow humidity to persist after use.
Design-build coordination helps keep these decisions connected. When the designer, builder, waterproofing installer, and other trades work from the same plan, the system is less likely to have gaps. That coordination, paired with careful installation, helps extend the life of the renovation and protect its structural integrity.
Request a Bathroom Estimate with professional waterproofing, or call (310) 382-1001 to talk through your options.
Frequently Asked Questions
What is the proper way to waterproof a bathroom?
Start with a complete system, not a single coating. The shower pan should include a properly installed, watertight membrane that extends up the walls as a continuous barrier. The floor must also direct water toward the drain. Wet-zone walls need an appropriate waterproof backer or a compatible membrane system, with transitions and penetrations sealed according to the system requirements. Tile and grout finish the surface, but they do not replace the waterproofing beneath it.
What are common shower waterproofing mistakes?
Common failures include treating cement board as waterproof, stopping the pan membrane too low on the walls. Leaving seams or plumbing penetrations unsealed, and building a shower floor without adequate drainage slope. Another mistake is combining products that are not designed to work together. Waterproofing should be planned and inspected as one coordinated assembly before tile covers the work.
How many coats of waterproofing do you need in a bathroom?
There is no universal coat count for every bathroom system. The correct application depends on the selected product, substrate, seams, corners, and manufacturer requirements. A reliable installation follows the system specifications and verifies continuous coverage, rather than applying an arbitrary number of coats. The shower pan, wall transitions, and penetrations deserve particular attention because gaps in those areas can allow water behind the finish.
What is the best waterproofing for a bathroom?
The best approach is the one properly matched to the bathroom design and installed as a complete system. Hot mopping remains a durable, traditional option for shower pans, while specialized waterproof backer boards and membrane systems can protect wet-zone walls. The priority is continuity, compatible materials, sound drainage, and careful installation. Professional planning helps protect the structure and the life of the renovation.
Ready to Waterproof Your Bathroom Remodel?
A properly coordinated waterproofing system helps protect your bathroom from moisture problems and supports a renovation built for long-term use. LevelWorks can help you plan the right approach for your Los Angeles project, from the shower pan through the wall assembly. To request a bathroom remodeling estimate that includes professional waterproofing, get a quote from LevelWorks or call (310) 382-1001.



